Becoming a professional photographer is hard work. If taking photos has been your hobby, and you want to know what the next step is, then this post is for you.
I asked a group of photographers this:
What is the one thing you learned that made you realize you are no longer a beginner photographer?
And the answers came. If you want to find out about photographers journey from beginner to pro read on.
This question really stirred up debates. Each journey is different. There is no one single way to become a PRO photographer.
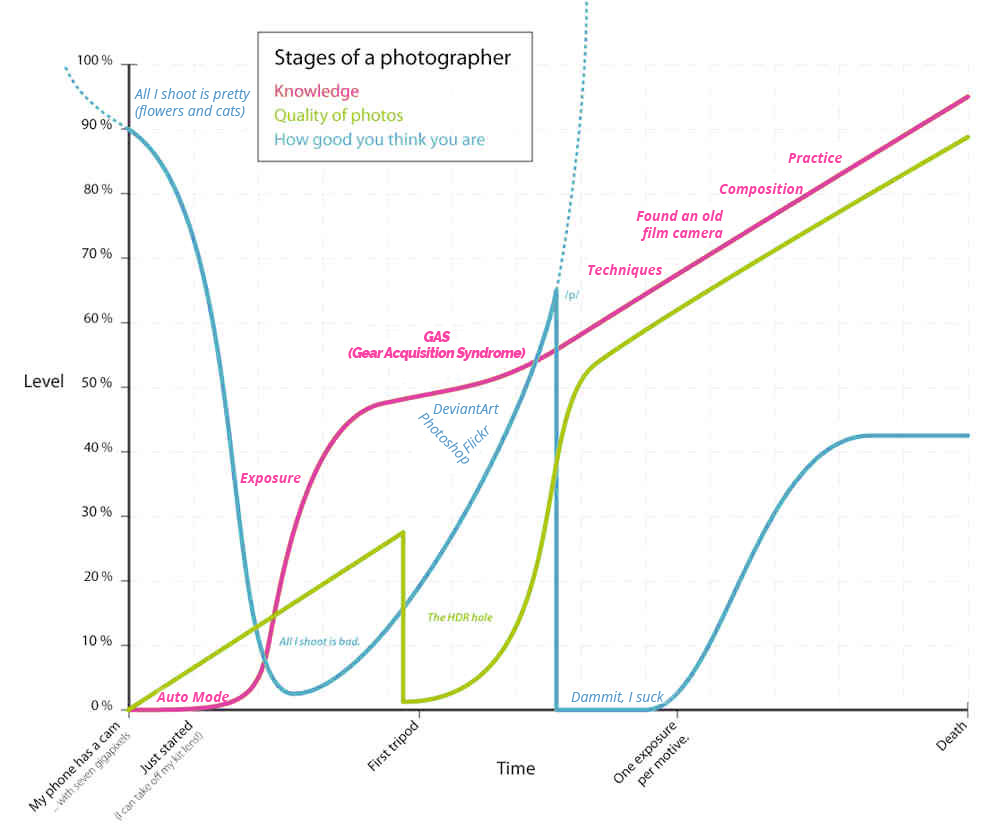
I got this graph from one of the photographers I talked to. I’d love to give credit to its author, but I don’t know who that is.
Though this graph might make you laugh at first it does contain a deep truth.
A photographer’s journey is about three things:
- Knowledge – what you know about taking photos
- Quality of photos – are your photos any good
- How good you think you are – your self confidence as a photographer
Let’s see what pro photographers wanted to share about their journey turning from beginner to intermediate and pro.
UPDATE Aug, 2018: I’ve accidentally found out that the chart above is a variation on the Dunning-Kruger effect.
What Is The Dunning Kruger Effect?
The Dunning Kruger effect refers to a psychological bias we all have that makes us over estimate our abilities. Also, the more you know about a subject, the more accurate your self evaluation will be.
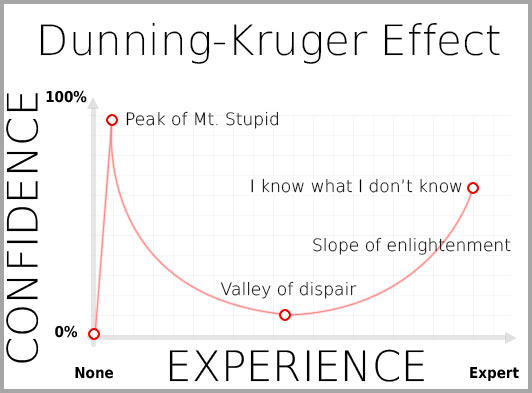
The Dunning Kruger effect chart shows:
- “Peak of Mt. Stupid” – when experience is virtually non existent there is a tendency to exaggerate the level of the abilities
- “Valley of dispair” – while more and more things are learned, you realize that there are a lot of things yet to learn
- “Slope of enlightenment” – with more and more experience and things learned you slowly advance
- I know what I don’t know – it’s what an expert means in the end: one that recognizes their own limitations.
[section cssclass=”toc”]
In this article:
- A Photographer’s Journey Is Never Over
-
Knowing the Rules and When to Break Them
- In Sports Photography Shoot at 1/500th sec or Faster
- The Inverse Focal Length Rule
- Sunny f/16 Rule
- Rule of Thirds
- Astrophotography Rule of 500
- Expose to the Right (ETTR)
- Technically Correct Is Not Necessarily Beautiful
- The Infamous Aperture/Shutter Speed/ISO Triangle
-
ISO Invariance – Increasing the ISO Does NOT Increase the Noise
- Shot noise
- Electronic Noise
- Where does ISO come in?
- Focus Stacking
- Photo Selection and Post Processing
-
Shoot RAW If You Can
- Advantages of shooting RAW
- Disadvantages of shooting RAW
- Conclusion
[/section]
A Photographer’s Journey Is Never Over
The truth is:
There will always be one type of photography in which you will be a beginner.
Photography is a vast domain. There’s portrait photography, product photography, macro photography, astrophotography, black and white, sports photography, etc.
Let’s face it:
Knowing them all will take time. That’s why a photographer’s journey is never over.
But that’s what makes photography exciting.
Knowing the Rules and When to Break Them
I’ve read a lot of books sharing photography rules, and rules can be good and bad.
Here’s why:
Photography rules are good if you use them as a starting point. A rule should never be used blindly and at the expense of the creative part.
Know the rules, know when to apply them, but also experiment with breaking them. This will give you some amazing photos sometimes.
Here are just a few rules that photographers wanted to share. Learning these rules made them feel that they were no longer a beginner.
In Sports Photography Shoot at 1/500th sec or Faster
Set your camera in Shutter Priority mode and set the shutter speed to 1/500th sec for moving subjects. For action shots you should go for 1/1000th.
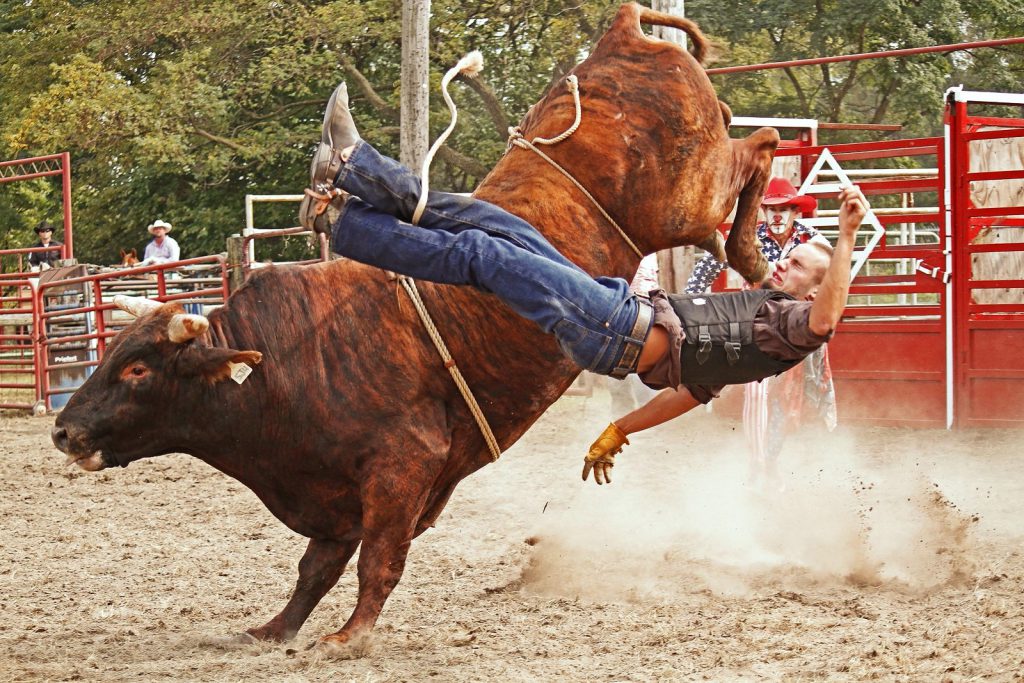
This will allow you to freeze the subject and avoid a blurry shot. However, on rare occasions you might want to get a blurry shot just to convey the movement and the effort of the scene. In one of my other articles you can read all about how to get a perfect blurred photo background.
The Inverse Focal Length Rule
You probably noticed this:
When shooting with a tele lens (zoom lens) the camera shake is more of a problem. It’s hard to hold a camera totally still with your hands. The bigger the zoom, the bigger the shake.
Try this:
Adjust your shutter speed according to the inverse of the focal length. If you are shooting at 200mm try a shutter speed of 1/200th of a sec. At 300mm, try 1/300th. You will get a sharp image.
Sunny f/16 Rule
This one is simple:
If you are taking photos in bright sun set your aperture to f/16. Set your camera in full Manual Mode and get the right exposure by setting the shutter speed to 1/x seconds where x is the ISO number.
For example, at ISO 100 use 1/100th sec. For ISO 200, use 1/200th sec, and so on.
Rule of Thirds
Imagine this:
Divide the frame into 3 equal parts horizontally using imaginary lines. Then do the same vertically.
If you compose your shot placing your subject in one of the lines’ intersection points you will get a very pleasing composition.
This is called the rule of thirds. And it’s a technique many photographers use as a guide line when composing their shots.
Why does the rule of thirds work?
It has to do with proportions and how the eye perceives images. Anyway I won’t go into details.
Just remember:
Placing your subject smack in the middle can create a very boring photo.
This also happens if you shoot a landscape and place the horizon line right through the middle of the screen.
Use the rule of thirds and make your shot flow on the division lines. The eyes of the viewer will be drawn towards the intersection points.
It’s not only about placing the subject in one of the intersection points. It’s also about dividing the frame into areas of interest.
For example:
Take a landscape shot. Align the bottom grid line with the horizon. The texture and color of the ground will take one third of the frame and the sky will take the upper two thirds.
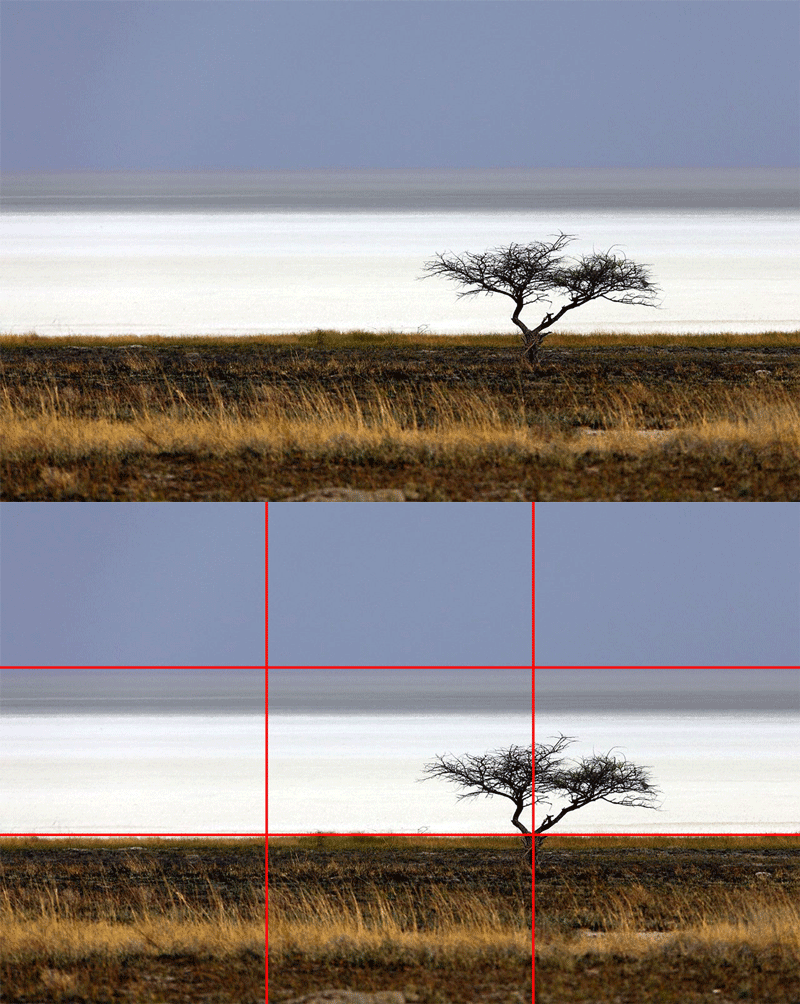
The composition will be more interesting than taking a half-half shot.
Again, remember, rules are meant to be broken.
Astrophotography Rule of 500
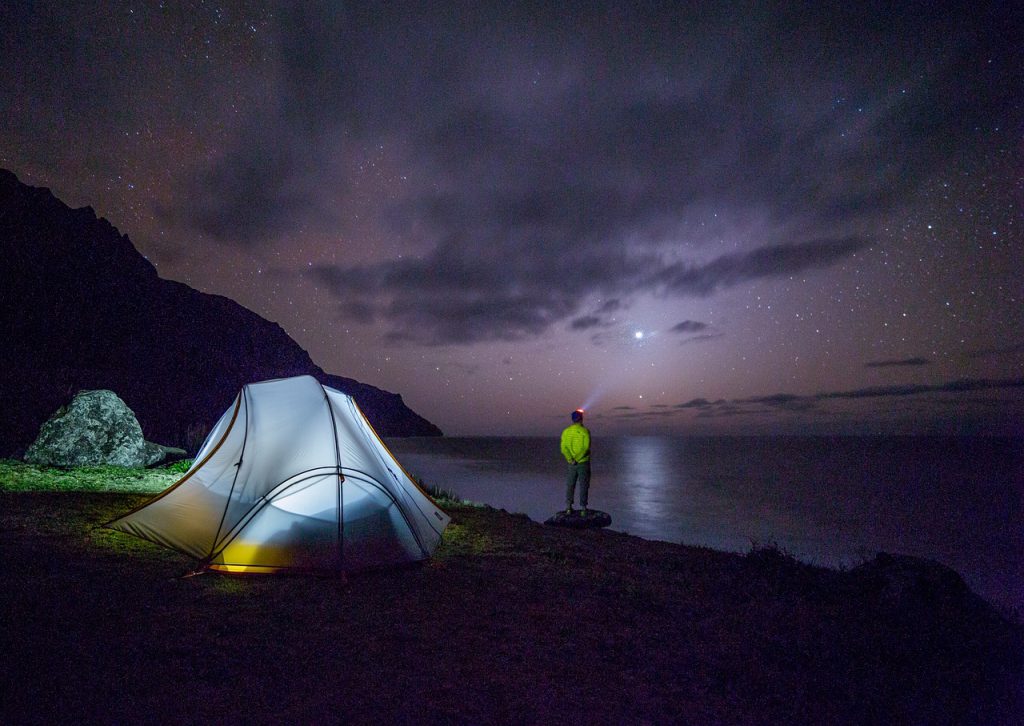
How do they take those Milky Way shots?
If you are like me you probably asked yourself that question. Because the night sky is so dark, you need to take very long exposures.
But, did you know?
Because the Earth rotates around its axis, the night sky appears to rotate. This means that a long exposure even on a tripod, will get your trails of stars.
So, what shutter speed is fast enough?
The rule of 500 gives a quick approximation of the shutter speed fast enough to avoid getting trail or blurry stars.
Simply divide 500 by the focal length of your lens and get the shutter speed.
Example:
If you shoot using a 24mm lens, then 500 / 24 = 20.8 sec. So a shutter speed of around 20 seconds will get you a sharp starry sky.
There are some that say it should be rule of 400, or rule of 600.
Bottom line is:
Experiment and see what works for you. Combining photograph and some Photoshop techniques I’ve created several space images and textures that you should check out.
Expose to the Right (ETTR)
The histogram
It’s that graph that shows how exposure is distributed between shadows, mid-tones and highlights.
If it’s crammed to the left it means that there are a lot of dark tones in the shot. If it’s crammed to the right, then there are a lot of highlights.
Expose to the right (ETTR) is the technique of getting your shots with a histogram crammed to the right. Take multiple shots with brighter and brighter exposures.
But be careful and don’t overdo it, or you’ll get an overexposed shot.
What’s the idea?
Camera sensors are better at capturing highlights than shadows. It’s better to take a brighter exposure as it will contain more information than a darker one. The more information you get towards the highlights (right of the histogram) the better.
But, won’t my shot be too bright?
Well, yes. But you can lower the brightness in post-processing. The overall contrast and the details in the shadows will be much better than if you exposed to the center or to the left.
Very useful:
Most cameras have a blinker display mode. This shows the overexposed areas in a shot. Those areas will not have recoverable info in them. Try to avoid those situations.
For applying ETTR efficiently you should shoot RAW.
Oh, and one more thing:
Please be aware that even on high-end cameras the histogram is based on the JPG version of the shot. Even when shooting RAW.
What that means is that the histogram displayed by the camera is not 100% correct. It might show overexposure (data climbing up the right side of the graph) when in fact there is no overexposure.
Technically Correct Is Not Necessarily Beautiful
“To photograph: it is to put on the same line of sight the head, the eye and the heart.” ― Henri Cartier-Bresson
A good photo has to transmit an emotion to the viewer. Photography is an art, it’s not simply a copy of reality.
Look at these photos:
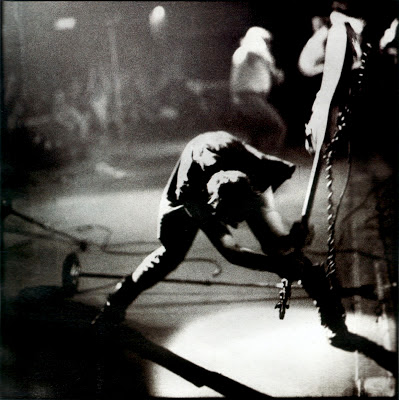
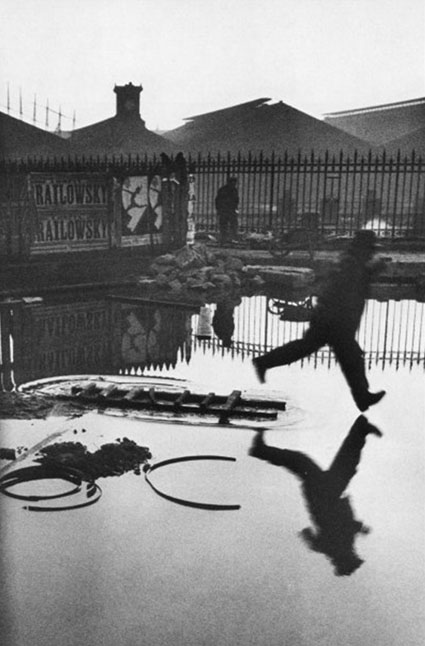
They are by far not technically correct. But their artistic value is undeniable.
So remember:
Photography is an art, a craft and a science. Use your mind, your heart and your soul to take a great photograph.
On this site you will find quite a few examples of beautiful black and white textures that you can download for free.
As a photographer I find it very convenient to transform some of my photos using these free black and white Photoshop actions
The Infamous Aperture/Shutter Speed/ISO Triangle
Most will say:
Find the right balance between aperture, shutter speed and the ISO and you will get the right exposure.
This is called “Aperture/Shutter Speed/ISO Triangle”. This technique can be very useful because it’s easy to understand.
I covered the details about this technique in the previous post 3 Powerful Photography Secrets For Mastering DSLR Manual Mode.
A word of caution:
The triangle is a comfortable tool, but it’s not entirely accurate. This is one of the point that really stirred up the debate with the more advanced photographers. One of them even called the triangle BS.
So, why is that?
Because the triangle does not take into account exposure. And when I say exposure, I mean the quantity of light that the sensor receives.
When learning about the triangle one might get absorbed with getting the 3 values aligned, forgetting about the actual light in the scene you are shooting.
Remember, you are shooting the light that bounces off your subject.
When using the triangle, the convention is that a higher ISO will result in a photo with more noise.
But that’s not entirely accurate.
This may go against everything you’ve heard so far. The shutter speed and aperture settings might impact noise more than the ISO setting.
If you want to know how and why, read the next section about ISO invariance.
ISO Invariance – Increasing the ISO Does NOT Increase the Noise
I hear this all the time
If you increase the ISO you will get a noisy picture.
That will lead to the conclusion that ISO is the only factor influencing noise in your photos.
That is simply not true.
Let’s first see what causes noise.
Basically, there are two sources for noise: shot noise and electronic noise.
Shot noise
In nature light is not uniform. It’s composed of small particles called photons. These photons hit the sensor and that’s how the image is composed.
Because these photons hit the sensor at random intervals the information captured is not uniform. That’s how you get noise.
It’s all about statistics. The more data you collect, the more accurate the results. Inherently, areas receiving less light will bounce less photons, areas well light will bounce more photons.
That is why darker areas will produce more noise in the picture. So you need to collect more photons from those areas. To do that you need to increase the exposure – or the amount of light that the sensor takes into account.
The ratio between the quantity of light information collected and the noise is called signal-to-noise ratio.
To get smooth photos you need to maximize this signal-to-noise ratio.
Electronic Noise
Beside shot noise, there is also electronic noise. That is random noise generated by the imperfections of the electronic components or various outside interference.
What does that all mean then?
It means that the noise in your picture is not determined by the ISO setting. It’s determined by the lack of exposure.
Also, you have to realize that all photos will have shot noise in them. You can’t avoid that. You can only minimize it.
Where does ISO come in?
ISO is the sensor sensitivity. The higher the ISO setting the less light you need to get your shot.
But, as we’ve seen before, collecting less light can decreases the signal-to-noise ratio. And that results in a noisy picture. It all depends on the amount of light available.
This may come as a shock:
Sometimes a higher ISO setting will help getting less noise in your shot. Let’s see an example:
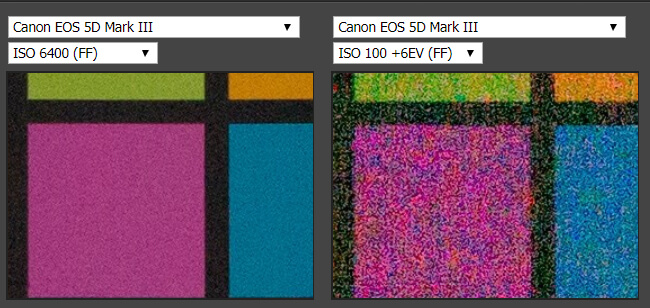
The image on the left is taken at ISO 6400. The one on the right is taken at ISO 100 and then brought 6 stops up. As you can see, for Canon 5D Mark III, there is a clear difference in noise.
Increasing the ISO in this case produces a much clearer picture. In this case increasing the ISO resulted in a much better signal-to-noise ratio.
Not all cameras are created equal.
Some camera sensors are so well built that there is barely any difference in noise even at a difference of 6 stops. One such example is the sensor on the Nikon D750.
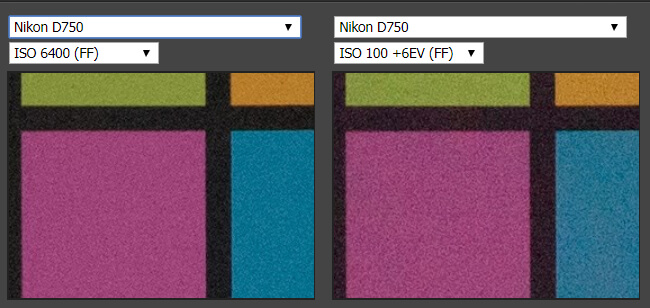
There is barely any difference between ISO 6400 and ISO 100 raised by 6 stops. This low variance is called ISO invariance.
There are two great articles that I recommend talking about the source of noise:
- What’s that noise? Part one: Shedding some light on the sources of noise
- Sources of noise part two: Electronic Noise
Did you know you can fake electronic noise in Photoshop using noise and glitch textures that you can download for free from Textures4Photoshop?
Focus Stacking
Another useful trick used by beginner and pro photographers alike is focus stacking.
Focus stacking is the technique of taking multiple shots of the same subject with the focus point in different areas. The resulting shots are then combined in one single image which looks like the entire subject is in focus.
I’ve known about this technique for years. But I only recently experimented with it.
I took multiple shots of an old pocket watch. I wanted to use my macro lens adapter to get very fine details.
Using the macro lens had the disadvantage that the focus distance was very small and it was impossible to get the whole watch in frame.
To solve this I took multiple shots of various parts of the watch with different focus points.
I then used focus stacking in Photoshop to create the parts of the watch in full focus.
Also using Photoshop I combined the parts of the watch using the Auto Blend option.
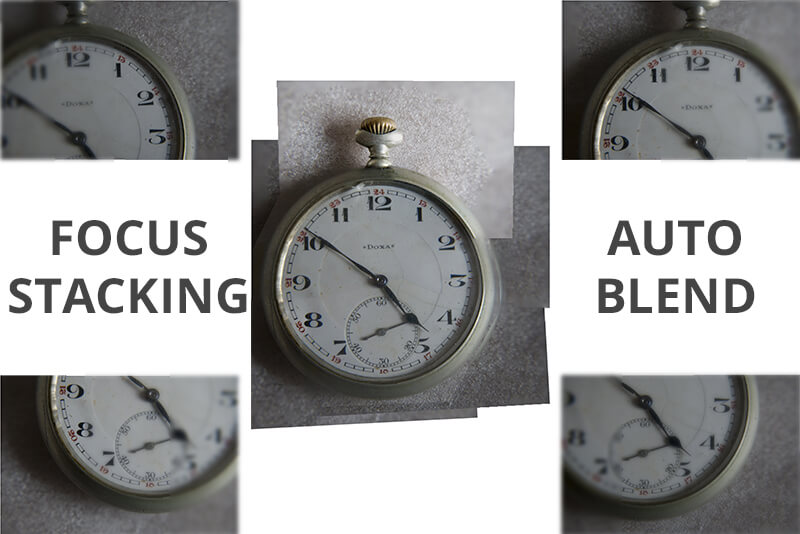
The results were quite impressive.
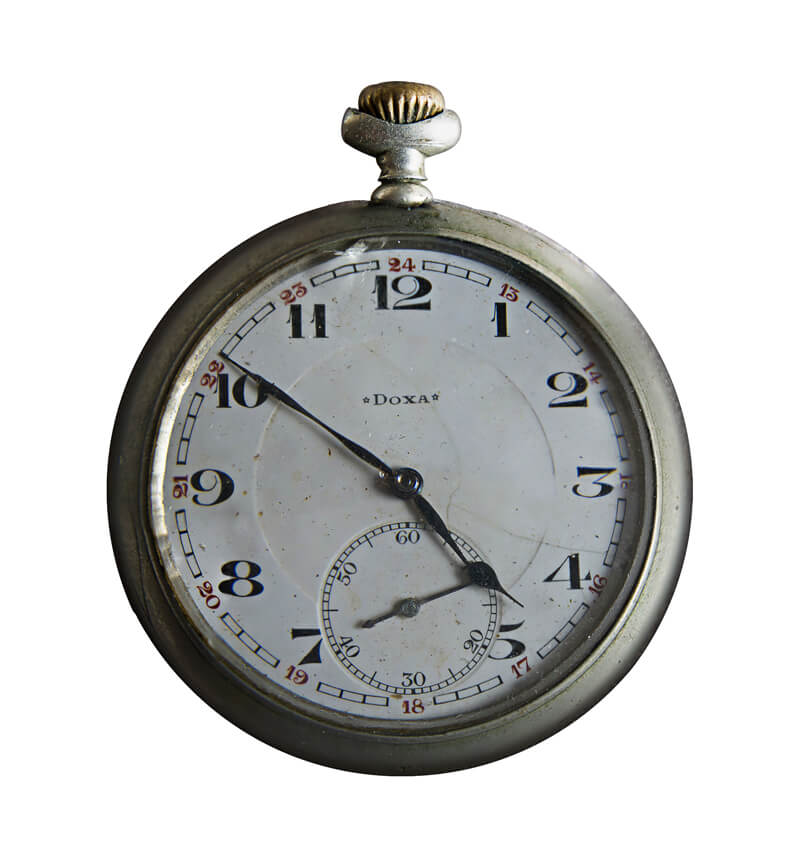
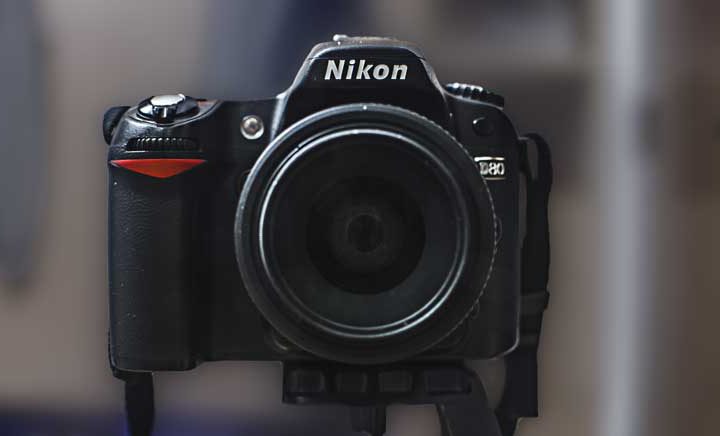
I got a 16 Megapixel image, much higher than the 12 Megapixels my Nikon D80 has. Also the subject is filling the frame and you can see all the details. You can download for free the full resolution old pocket watch PNG file.
Photo Selection and Post Processing
In the old days, photography was made using film. You loaded up your camera with a film roll which could only take 36 exposures.
That meant you needed to be very selective with what and how you shot.
In the digital era you can get hundreds of shots before filling up your memory card. This makes many photographers a bit “careless” how many shots they take.
Here’s what experienced photographers have shared with me:
It’s very important to know which shots to take and which shots not to take.
This sounds funny, but with this in mind you will give more thought and attention to each shot you take.
At the end of a long day of shooting you will thank yourself if you don’t have to browse through thousands of photos.
Most of the shots you will have to throw out. The photos you choose will reflect how good a photographer you are. So, the less photo you throw out, the better photographer you have become.
Post processing is another important aspect of pro photographers life.
My advice:
Take a look at Adobe Lightroom and Photoshop and learn at least the basics of post processing if you are serious about becoming a pro photographer.
Shoot RAW If You Can
All DSLRs have the option to shoot either JPEG or RAW.
As a pro photographer you should know the difference between the two. Then you can make your informed choice.
Here’s the thing
Over the years I went back and forth between shooting only JPEG and shooting only RAW.
There is no right or wrong, but shooting RAW sure has it’s advantages and disadvantages.
Advantages of shooting RAW
- Forget about white balance. When shooting RAW white balance is not a variable. You can change it in post production without any quality loss.
- More image information. RAW files contain all the information that the sensor receives. Also most cameras process a 12 bit or 14 bit color depth model. That means that the RAW file will store up to 4.3 trillion different color compared to the 16.8 million colors supported by a 8 bit JPEG. Also this helps to eliminate banding (that ugly gradient stripes which will ruin prints).
- It’s what professionals use. If you deliver your photos to clients that plan to use it in prints for example, you should provide them with the RAW files.
There are also some disadvantages that you should be aware of.
Disadvantages of shooting RAW
- RAW files are big. That means that your memory card will fill up faster. Transfer will take more time.
- RAW files require processing. You will have to take each RAW file and post-process it. You need special software for this.
So now you know.
There are advantages and disadvantages to shooting RAW.
If your top priority is the quality of your photos then my advice is to shoot RAW.
Conclusion
Becoming a pro photographer will take years of learning and practicing.
Each photographer journey will be different and the journey will never be over. There will always be new things that one can learn.
In the end
Photography is an art. It requires you to use your eyes, your heart and your soul.
Art is subjective. There is no perfect photo. You will always be able to improve yourself and become a better photographer.
I hope you enjoyed this article.
What did it mean for you becoming a photographer? Share this in a comment below.
For me, my photographer journey lead me to the creation of this website to share stock images and textures for free.

WOW! I just finished reading the entire article 🙂 it is quite good…
I’ve learned lots of new photography tricks. The section about Focus Stacking is one of my favorite, as I often use Photoshop.
Many cameras need a UniWB custom white balance, if you want accurate histograms and overexposure blinks for in-camera RAW image reviewing. This is an ugly trick which makes all UniWB photos greenish, but unfortunately there is no other way. Optimized usage of ETTR need UniWB.
I made a near perfect UniWB custom balance for my D3200 with these instructions:
http://www.guillermoluijk.com/tutorial/uniwb/index_en.htm
Maximized amount of light exposure is the goal to get the best image quality. Practically there are many obstacles which can prevent you to do this like low light, motion and produced sensor heat (many seconds of exposure). Best case scenario would be that you use base ISO setting (usually ISO 100) and can increase exposure until something too visible is clipped (overexposed to white). Assuming that you are already happy with shutter speed (motion blur), aperture (focus range, optical output quality), focus and composition.
You can push image quality even further, if there is not too visible motion by doing several shots with different exposure settings. This is called bracketing or HDR shooting. Usually you need post-processing to combine these multiple shots to one photo. Enfuse is one software which can do this and it is free. It is a bit hard to use, but for Lightroom there is a plugin called LR/Enfuse. You need to make a donation to get the plugin registered.
This is a really good article and informative. I’m just starting my journey and there are lots of info on the web and debates I think the best thing to do is just go and take photos and discover your camera and have fun the rest comes later.
Very nice, thank you!
Thank you!
Glad to be of help
Most of it is just the basics, but when you go more in-depth, you’re quite wrong..
Exposure is the combination of Aperture vs Shutter Speed. Those two variables are the most important in determining the exposure. Exposure is nothing more than the amount of light let in. Now the longer the shutter stays open, the more exposed. The wider the aperture, the more exposed.
Also when you talk about RAW.. real Pro’s will always use RAW for their shoots, and the disadvantage you mention of RAW requiring processing, is actually the greatest advantage of RAW. You get so much more out of a RAW photo. As a beginner, I switched to RAW from Jpeg the moment I started using the a/s/m modes on my Nikon, so basically my whole photographic career. I’ve never regretted it, and I have never felt that a photo would have been better if it was shot in JPEG.
Also, because RAW requires processing, no pro will deliver that image format to their clients. Its like hiring a painter to paint your house, and the painter then handing you the brush and paint and saying he’s all finished up.
Hi Michael,
thank you for your comments. Can you be more specific and tell me where I go wrong? If you refer to the section about the aperture/shutter speed/ISO triangle, when I say to take exposure into account I mean exposure as in the amount of light present in the scene, so what a light meter would indicate if you take a reading.
You can’t rely only on the meter of the camera as that will always try to expose to a neutral gray.
For ex. shooting in a dark alley, shooting a landscape with snow or shooting against the sun will require exposure compensation, and that’s a manual setting that the photographer will make taking into account exposure. That’s what I meant.
Regarding RAW files, as with all things there are opinions and opinions: search for Jared Polin’s and Tony Northrup’s recent online debate on YouTube and see arguments both ways.
Most of the times you would deliver the processed photo to a client, but there are cases where the client might want the RAW file too (especially if they are magazines and they have their own graphical designers team).
Hi! Would you mind if I share your blog with my twitter group?
There’s a lot of peopoe that I think would really appreciate your content.
Please let me know. Many thanks
sharing is always good! please do
Thank from Yuriko Nonnemacher
Thank from Kurt Breitung